This post contains affiliate links
Nut height is a commonly overlooked aspect of bass guitar maintenance.
I get it, as it can seem insignificant at first glance. However, nut height has a massive impact on the playability, tone, and longevity of your instrument. Thus, getting it right from the get-go is well worth it.
Furthermore, despite being easy to adjust I`ve seen many bassists find it intimidating to work on the nut.
In truth, there is very little that can go wrong when adjusting the nut on your bass guitar if you go about it correctly. Thus, I have gathered all the information you need about nut height for the bass in one place, so that you won’t have to look any further.
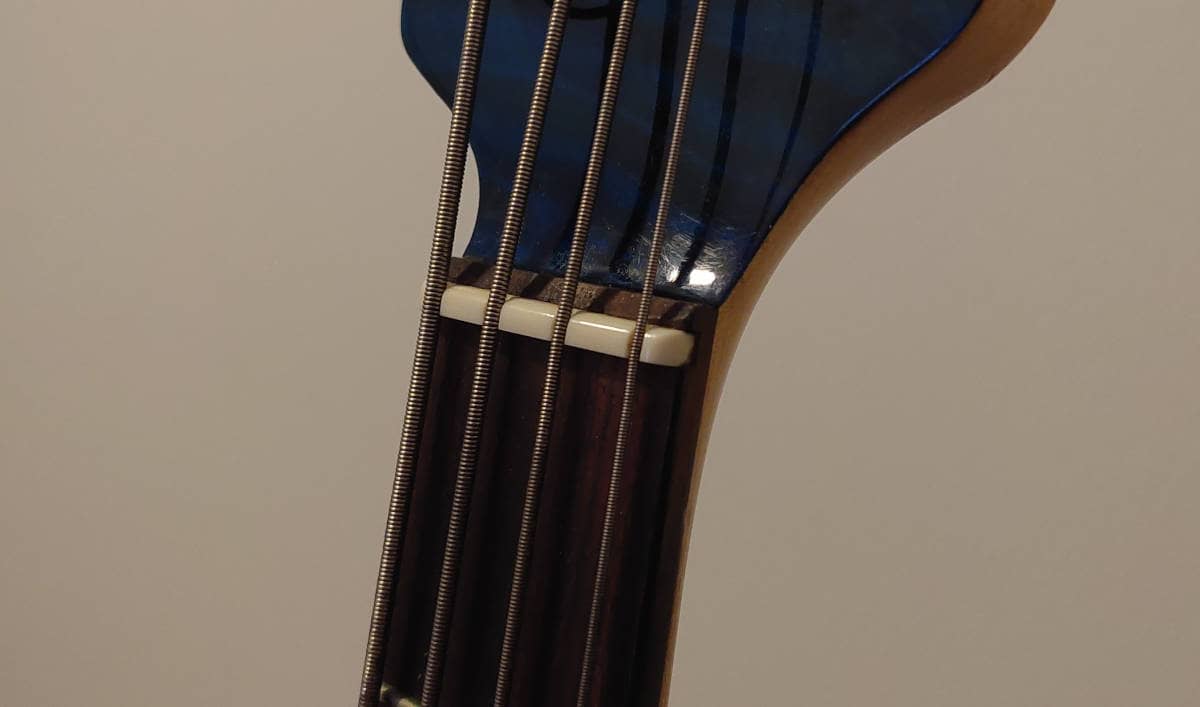
What is the nut of a bass guitar?
The nut of a bass guitar holds the strings in place between the first fret and the head. A nut’s purpose is to maintain the intonation of the instrument and stop the strings and neck on the bass from getting damaged.
The nut is a necessary part of the bass as it perseveres the strings and helps hold them in place. It also serves to keep the intonation in order, as tight strings and high action on your bass will bend its neck faster.
Thus, by keeping the strings in place and the action low, the nut preserves the tone and condition of both your bass and its strings.
Modern bass nuts are commonly made out of plastic, but they can also be made out of metal, graphite, and wood. Some higher-quality nuts are made of Fossil Ivory or bone.
There are bassists that prefer having a zero fret in addition to the nut as it removes the need to file your nut precisely. It also makes the tone of open strings more consistent with that of fretted ones. However, this is less common and the vast majority of basses have a nut.
How high should the nut be on a bass guitar?
The nut height on a bass guitar should be set at 0.0030″ to 0.0045″, or 0.076mm to 0.11mm. This height is found by fretting your strings at the third fret and measuring the distance from the top of the first fret to the bottom of the strings. This can be done using a sheet of paper, a US dollar bill, or a feeler gauge.
When dealing with nut height you are dealing with extremely small measurements. Thus, it is incredibly difficult to be 100% precise.
Luckily, you don’t need to be.
Start by fretting your bass at the third fret like in the picture below. You can also use a capo for this if you have one available.
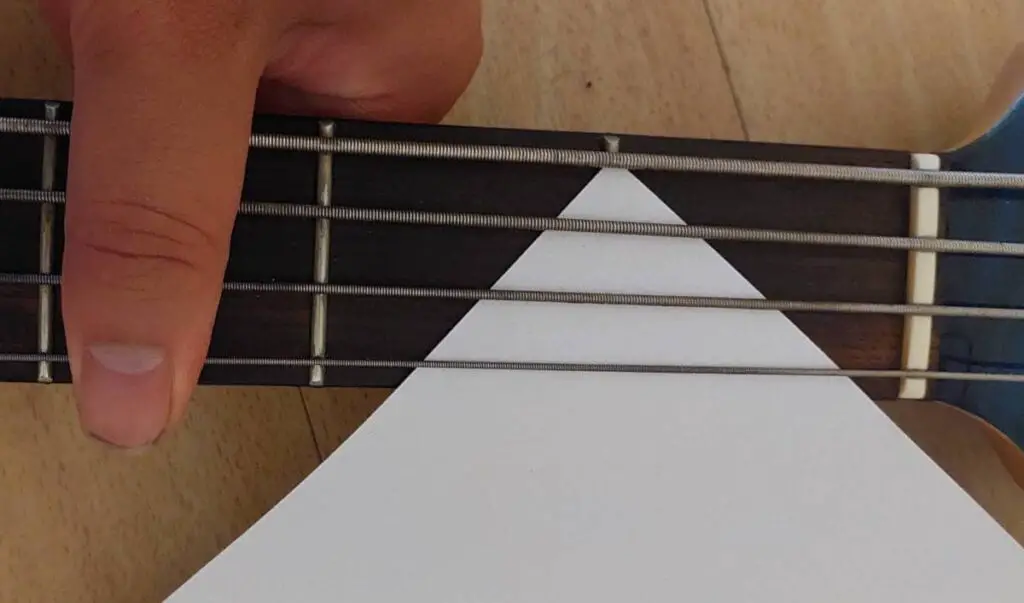
With the strings pressed down, start measuring your nut height at the first fret.
When you press down the strings against the first fret you should feel a tiny amount of space underneath. The strings should not be touching the fret without your help, but they should come really close.
If you want to measure this more precisely you can use a sheet of paper or a dollar bill. A standard A4 paper sheet is 0.004″ or 0.1mm. A dollar bill is 0.0042″ or 0.102mm. Thus, they are both great ways to get a quick estimate of your nut height.
Instead of pressing the strings down at the first fret, slide the paper or bill underneath the strings. It should just barely be able to slide in underneath the strings if your nut height is set correctly.
Tip: For a more exact measurement, you can also use a feeler gauge. If you don’t have a feeler gauge I recommend this one from Amazon, as it has a 0.003″, 0.004″, and 0.005″ blade.
If the nut height is low, this results in your strings and frets touching. You want to avoid this, as it will cause your bass to produce a static sound when plugged in. Having your nut height too low will also negatively impact the tone and playability of your bass.
If the nut height is too high, this will increase the action of the bass. In turn, this makes the bass harder to play. It also negatively affects the intonation of your bass as your strings will need to be stretched longer when played.
Note: While higher action will make your bass more difficult to play, some bassists prefer the tone that higher action provides. To read more about how the action on your bass impacts your instrument, check out my article on what low action means.
Adjusting nut height
Always make sure you have checked the nut height on all your strings before you start adjusting your nut. Some nut slots might need more adjusting than others, and some might not need any at all.
Adjusting the nut height on your bass is quite simple, but it’s important that you go about it the right way. This is because it’s much easier to decrease it than increase it. Luckily, if you follow these steps carefully, this won’t be something you have to worry about:
- Remove strings from the nut – Tune your strings so loose that you can lift them out of the nut. You should be able to lift them without feeling resistance or having to use any strength.
- File the nut slot – The nut slots are the cuts in your nut where your strings rest. Carefully start filing the slots that are in need of it. (If you don’t have a file that`s small enough, this beginner set of Amazon is of perfect size for filing a bass nut). Start by filing a little bit at a time. Filing too little is fine, but filing too can become a major hassle.
- Check your nut height – After filing, restring your bass to see how this has affected your action. While fretting your strings at the third fret, use a piece of paper, a dollar bill, or a feeler gauge to see if it fits between your first fret and your strings.
- Repeat – Repeat steps 1-3 until your nut height is set where you want it.
- Gather filings – When you file your nut it is also going to produce some filings. Make sure you gather these, rather than throwing them away. This is done so that in case you file too deep you can reglue the filings unto your nut slots. I prefer gathering them by placing a piece of paper (the larger the better) under the bass when doing the filing.
If you end up filing too deep you can mix the filings with super glue. This will give you a mix that you can apply back into the nut, thus raising the height. Always give it more than enough time to dry before your start readjusting the nut height.
Alternatively, you can purchase a new nut. If you buy a plastic one, you can get generally get one for less than $10. However, switching your nut requires some DIY work too, so I recommend trying to fix your old nut if possible.
Conclusion
As soon as superglue and files are mentioned some bassists tend to get a skeptical look on their faces. Thus, I hope this article shed some light on why adjusting nut height is not as intimidating as it can seem at first.
Naturally, you could take your ax into a shop to get your nut height adjusted. However, they would do exactly what I have described above, for a price.
Therefore, adjusting the nut height on your bass guitar is something that is usually worth doing yourself.
It’s also not a big deal if you mess it up, as excess filings can be reattached using glue if you file your nut too deep.