
Maintaining your bass guitar in good condition is an essential part of being a bassist. Luckily, if you go about it the right way this does not require excessive amounts of work.
As I embarrassingly have to admit, maintenance was not something I paid much attention to when I got my first bass. After 15 years of playing, I now keep my instruments in good shape. However, some of these lessons had to come the hard way.
Therefore, I decided to make this guide on bass maintenance and how to care for your instrument. In it, I cover every aspect of how to care for your bass, keeping things simple while covering everything.
This way, you will be prepared for every issue you will run into when trying to keep your bass in good condition. You will also learn about the basic upkeep needed to prevent major issues from happening in the first place.
Helpful reading: If you are unfamilair with the various parts of the bass which I talk about below, feel free to use my article on the different parts of the bass for reference.
How do you maintain a bass guitar?
In my view, there are 5 different categories of bass maintenance:
- Cleaning
- Storage
- Electronics maintenance
- Setup and service
- String Maintenance
With some basic knowledge of each category, you will be 90% on your way to maintaining the condition of your bass. I go more in-depth about each point below, but first, here is an infographic I made. It will give you a clear overview of what each category entails:
Cleaning
Bassists differ a lot in how they approach cleaning their bass. Some only do it when it starts to get excessively dirty, if at all. Others could not imagine anything but giving their instrument a wipe after each time they play.
Personally, I briefly clean my bass after every few sessions and give it a more thorough cleaning every 1-2 months. I have done this for years and this has kept my basses fresh-looking and in playable condition.
And remember, always unplug your bass before you do any form of cleaning.
Cleaning dust off the bass
If you let dust build up on the bass, it can easily get stuck in places where it is hard to remove from. Examples of this are the bridge saddle and pickups. Thus, regularly wiping dust off the bass can mitigate a whole range of potential problems.
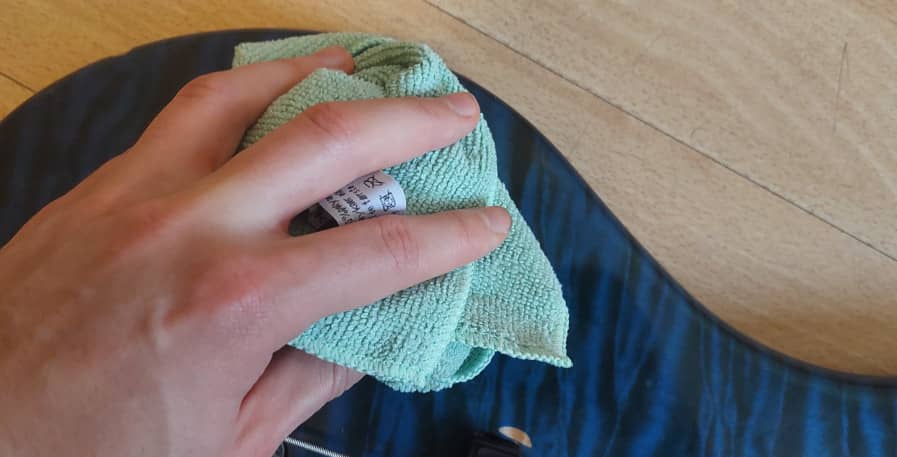
To do this, use a cloth to give the whole bass a wipe. I prefer using a microfiber cloth, but any cloth with a soft surface will be sufficient. Make sure to wipe the dust off the neck, body, and headstock, as well as all the hardware parts.
Preventing dust from building up is both quick and important, and therefore do it every 2-3 times I play. Others do it after every single time they play. While I don`t find that necessary, it is a whole lot better than neglecting this part altogether and will definitely not hurt.
Cleaning the neck of the bass
The neck of your bass is constantly exposed to oil and dirt from your hands. As a result, dirt has a tendency to build up quickly on it if left uncleaned.
To effectively clean it, again wipe it with a soft cloth, but this time apply lemon oil to it. This has worked wonders for me by using Dunlop`s Lemon Oil, which is specifically designed for cleaning bass and guitar necks.
For this, I find it sufficient to loosen the strings. If you prefer, you can temporarily remove them to make the cleaning process easier.
While you can use different brands of lemon oil, avoid using non-lemon types of oil. Olive oils and the like will not properly clean the fretboard and will lead to the neck becoming smelly and sticky.
I`ve heard various experiences about using rubbing alcohol. Some bassists have seen good results while others have stated that it dries out and damages their necks. Thus, as I know from experience that lemon oil works well, I stick to it, which avoids the risks many other cleaning solutions bring with them.
I do this every 1-2 months, depending on how much I have played the bass and whether I see any dirt starting to build up. If you play the bass often and your hands tend to sweat a lot, I recommend cleaning the neck more often.
Cleaning the bass strings
Similar to the fretboard on your bass, dirt also builds up on your strings due to their constant exposure to your hands. In addition to making fretting less comfortable, this can make your bass string smell, and negatively impact the sound of your instrument.
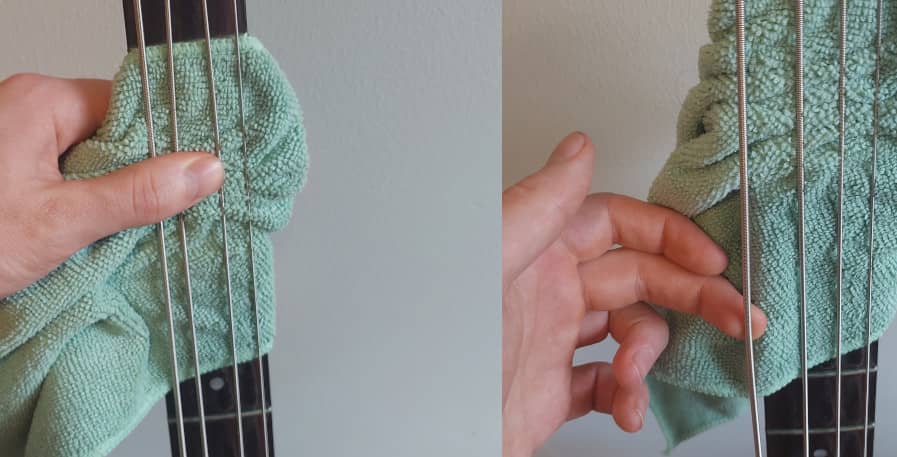
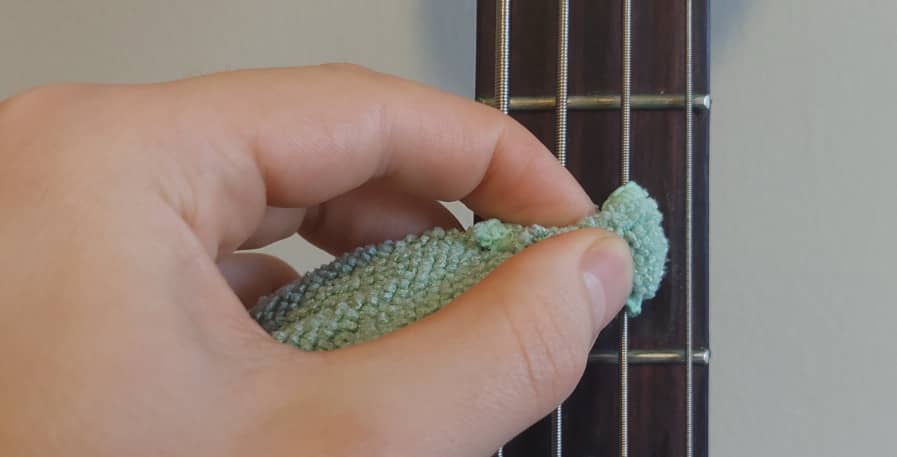
The cleaning process is similar to wiping the neck. However, instead of wiping, I find it more effective to wrap a cloth around one string at a time and drag it across them.
Lemon oil will generally be sufficient for this purpose as well. For a more thorough cleaning of the strings, you can also opt for a string cleaner. Alternatively, you can use mix the lemon oil 50-50 with vinegar.
Also, it`s best to not use the cloth you use to clean your neck and strings to clean other parts of the bass. This can lead to oils being distributed over to other parts. Thus, make sure to use different clothes for different purposes.
Cleaning the electronics
If the electronics on a bass are left to themselves, dirt can build up and result in them not working properly. At worst, they can also corrode and become unusable, especially if it is not stored properly.
For electronics, never use water or cleaning products that are not specifically intended for the purpose. Personally, I recommend using this contact cleaner from Caig Laboratories, as it has worked wonders for me in the past.
You can opt for a different brand if you like, but make sure that it is suitable to use on basses. What you are looking for is a cleaner that dries quickly so that it doesn`t attract more dust. It should also be usable on all types of metal connections so that it doesn`t do more harm than good.
I generally clean the electronics with contact cleaner 2-4 times a year, depending on how much of a need I notice for it. With that, here are the 3 types of electronics that need to be maintained:
Pots (Tuning Knobs)
To clean the pots on a bass, first, open up the big cavity on the backside of your bass with a screwdriver. Here, apply a little bit of contact cleaner onto the side of the potentiometer. There should be a small lunge where it is connected to the rest of the electronics. Apply the cleaner there.
Then, twist the knobs on your bass a couple of times. This spreads the contact cleaner effectively, without you having to worry about loosening any of the electronics in the cavity.
On some basses, the cavity is instead hidden behind the pickguard. In this case, the process is the same, though instead of unscrewing a lid on the backside of the bass, you unscrew the pickguard itself.
Pickups
Make sure to remember to dust off the pickups when you are dusting off your bass. If you notice any further dirt building up on them, it is generally sufficient to wipe them with a dry cloth.
For more thorough cleaning, you can opt to use compressed air. However, I rarely notice a need for this, as wiping off the pickups tends to keep them in good shape in my experience.
Jack Output
The first method I ever used to clean the jack output is the same method I`ve stuck with since. This is to use a piece of steel wool with contact cleaner on it and gently twist it around in the jack output a couple of times.
This spreads the contact cleaner around the jack output, in addition to the steel wool itself helping in keeping it clean. Just like with the two abovementioned methods, you only need to use a tiny bit of contact cleaner.
Storage
Storing your bass guitar is a simple and straightforward part of its maintenance
At the same, it is crucially important. This is because Improper storage can lead to lasting damages. In severe cases, it can even ruin a bass and make it unplayable.
To prevent that from happening, do the following when storing your bass:
- Store it at a stable humidity
- Store it at a stable temperature
- Keep it inside a gig bag or in a case.
- Store the bass on a stand or wall hanger
- Store the bass in an upright position
- If you cannot store the bass upright, cover it with a sheet and keep the strings facing up
In most climates, this can be achieved by storing your bass at room temperature. Keep the bass inside a bag, case, stand, or wall hanger. Most importantly, avoid storing it right in front of windows where it will be exposed to direct sunlight at some point during the day.
And while many like to complicate bass storage, with these simple steps I`ve never had storage-related issues with my basses.
Electronics
Electronic maintenance is crucial, as electronic issues can lead to your bass not being able to produce an amplified sound.
Luckily, they require little maintenance and are not something you have to concern yourself with most of the time. Aside from cleaning, the only upkeep concerning electronics is changing batteries. There are also some issues that can rise from problems with the electronics, which I`ll show you how to prepare for.
Always unplug your bass before doing electronic maintenance.
Changing Batteries
Some bass guitars use batteries while others do not. Passive basses do not use a battery and can always be plugged in and played. Active basses, on the other hand, have a preamp built into them. Thus, they require a functioning battery to be played through an amp.
If you are unsure if your bass is active or passive, look at the backside of the body. On basses that have two covers on the backside, the smallest of these houses the battery and you have an active bass. If it only has 1 cover, you have a passive bass that does not use a battery.
Basses use 9V batteries and the lifespan of a bass battery tends to be between 6 and 12 months.

Having the battery go out during a band rehearsal or live show without a spare can be devastating. Thus, while easy, changing the battery is an important part of maintaining an active bass. Therefore, it is a best practice to always carry a spare battery.
When the battery is close to being drained you will notice the sound of the bass becoming faint and unpleasant.
For a preventive measure, you can monitor the condition of the battery with a voltmeter. This way, you can see how close the battery is to being drained, and you can switch it out before this ever becomes a problem.
To switch batteries, use a screwdriver to open the lid on the back of the bass. Depending on the bass, you can then usually slide or pop the old battery out of the cavity. Many basses will have loose cables connected to the battery slot, so be careful not to use too much force.
Identifying and fixing electronic issues
From time to time, your bass may start making unwanted noises. Oftentimes this is in the form of a static buzz, but it can also sound muffled, distorted, or not produce a sound at all.
Following the other steps in this guide will greatly mitigate the chance of this happening. However, here are some common electronic-related issues, all with guides I`ve written to solve them:
- General Static Sound – If a bass makes a static sound this can among others things be caused by a faulty cable, interference, or a grounding issue. Refer to my guide on what to do when your Bass is producing a static sound to diagnose and fix this.
- Hum, when not touching the strings – Lack of grounding, or the use of single-coil pickups are some of the possible causes for this. If this happens, read what to do when your Bass makes a humming sound when not touching the strings
- Strings make a buzzing sound – String buzz is often related to non-electronic issues with the bass, or faults in playing technique. However, it can also be a result of similar issues as mentioned above. Thus, check out my article on why bass strings are making a buzzing sound to diagnose whether this is an electronic issue or not.
- The bass guitar rattles – If your bass makes a rattling sound, it is rarely an electronics issue. However, it can be. When this is the case, it is because electronics have become loose, which I talk more about in my article on what to do if your bass produces a rattling sound
Setup
In order for your bass to sound optimal and feel smooth to play, it needs to be set up occasionally.
A setup includes adjusting the neck and string tension, string height and action, and intonation. It might also include pickup and nut height, or rejuvenate worn-out frets if needed. In total, this ensures that your bass remains well-balanced, pleasant sounding, and easy to play.
I recommend getting your bass set up about twice a year, or at the very least once. Setups are especially important if your bass is exposed to major changes in humidity. Personally, I set up my bass about every 6 months but this depends greatly on when I notice a need for it needing a setup.
Beginners bassists in need of a full setup can opt to pay a luthier to do it for them. This ensures that your bass gets set up correctly, and so that you can focus on improving your playing.
Not counting the cost of new strings, the average cost of a bass setup is $63.18
However, knowing how to set up your bass is a useful skill to know for all bassists. Knowing how to do it will also save you a good bit of money down the line.
Furthermore, you will run into situations where you might only need to do certain parts of a setup. In these cases it can be helpful to know why and how to do the following:
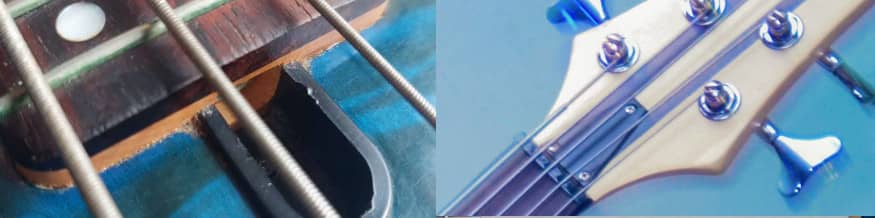
Adjusting the truss rod
Inside the neck of your bass, there is a rod that keeps the tension of the bass balanced. It`s called a truss rod and adjusting it will affect string tension, intonation, and action.
Thus, if your bass doesn`t sound in tune after tuning it, or the distance between the strings and fretboard is too high, you might want to adjust the truss rod.
There is a compartment on your bass, either right above or below the neck, where you can adjust the truss rod. Some basses have a cover over the compartment, whereas others will not.
The adjustment is made using a small alan wrench. Turn it clockwise to tighten the neck, and counterclockwise to loosen it.
Make sure to only loosen or tighten the truss rod in small increments at the time. This is because too drastic changes in tension can be damaging to the neck, and in extreme cases cause it to break.
If you are inexperienced, start by turning the alan wrench a quarter turn at a time. Give the bass some time to adjust, at least an hour or so, retune it, and check its condition. Repeat this process until the neck relief feels and looks right when you inspect the neck.
Inspecting the neck and fretboard
A great way to inspect the neck as you adjust the truss rod is to look directly down from the bottom of your bass. The neck should have a light bow; not completely straight, but almost.

You should also look at how the adjustment impacted the strings and fretboard. As I detail in my guide to bass nut height, you should end up with a minimal amount of space between the strings at the first fret. I`m talking between 0.0030″ and 0.0045″ or 0.076mm to 0.11mm of space.
How low you can expect it to be at the 12th fret frets varies greatly between basses. In general, aim for between 1/16th” and 9/64″, or 1.6mm to 3.5mm. I go more in-depth about what you can reasonably expect from different basses in my guide to what low bass action is.
Adjusting String height
The truss rod adjusts all the strings at the same time, but what if the individual strings are uneven? Moreover, what should you do if the neck already has a lot of tension but the string height feels completely off?
This is where adjusting the height of the strings themselves comes in. This is done at the bridge saddle, located at the bottom of the bass.
Here, each string sits in a saddle, which all have a small screw on each side of it. Use a small alan wrench to turn these screws to adjust the string height. Turn it clockwise to increase the height, and counterclockwise to lower it.
After doing so, make sure to inspect the bass to see whether the strings are at an even height across the whole neck. Then, tune the bass and play it at different spots on the neck to see if it sounds in tune.
If the string height looks even and the bass sounds in tune, you are good to go. If it looks uneven or there is an intonation issue, readjust the strings to attain an even height.
Finding your ideal string height and action
Personally, I prefer the action on my bass to be as low as possible. This makes it easier to fret strings, which in turn makes it less cumbersome to play and makes fast lines easier.
Bassists who prefer high action generally do so because they prefer the tone of it. Thus, the trade-off between high and low action is mainly a question of tone versus playability.
This is not to say basses with low action sound bad though. Furthermore, I also recommend beginners opt for as low action as possible, due to it making the instrument easier to play.
With all that said, setting your action too low will result in fret buzz. This happens when the strings are so low that they start making contact with the frets.
Thus, tension and string height is a balancing act, without a clear-cut answer. To begin with, my best advice is to adjust the strings as low as possible without making contact with the strings.
There is however nothing wrong with playing with higher action if you want to. Just ensure that the tension of the neck isn`t too loose or too tight, and the intonation of the bass isn`t off.
String Maintenance
Improper string maintenance can result in your bass becoming harder to play. It can also lead to strings smelling bad, and in extreme cases becoming corrosive and dangerous to your hands.
On the other hand, changing them too often leads to a good bit of extra work. Bass strings are also expensive and can noticeably add to the cost of playing bass if they are switched often out often.
Thus, this section will teach you how to reach a middle ground that avoids health hazards, saves money, and retains the playability of your bass. It covers how often to change strings, what to do when a string breaks, and how to change strings.
Changing bass strings
There are many bass players who use a set of strings for as long as possible. This means that they will not replace strings unless one of them breaks.
I used to do this while playing roundwound strings, which I do not recommend anyone do. This will result in the strings gradually losing their tone over time, and eventually sounding completely dead. Your bass will be playable and you can still practice on it, but it will sound unsuitable for recordings and live shows.

Nowadays, I make sure to keep the strings fresh by rejuvenating or changing them regularly. Generally, I end up switching them every 6 months or so, and more often if I notice a need for it. It also bears mentioning that the lifespan of strings can be extended a lot with proper cleaning (more on that later).
If you play flatwound strings, things are different. The lifespan of flatwound strings is essentially infinite if you prefer a musky and warm sound.
Thus, you can get away with never changing them, with some bassists only finding their sound more pleasant over time. If you prefer a fresh flatwound sound, you can of course elect to change them. With that said, expect flatwounds strings to last longer significantly longer than roundwounds.
Lastly, unexpected things can happen. For example, bass strings can start rusting or suddenly snap. This can be heavily mitigated with a your playing technique, storing your bass properly, and regularly cleaning it. I mention this because it’s important to keep in mind that you might run into unexpected string changes from time to time.
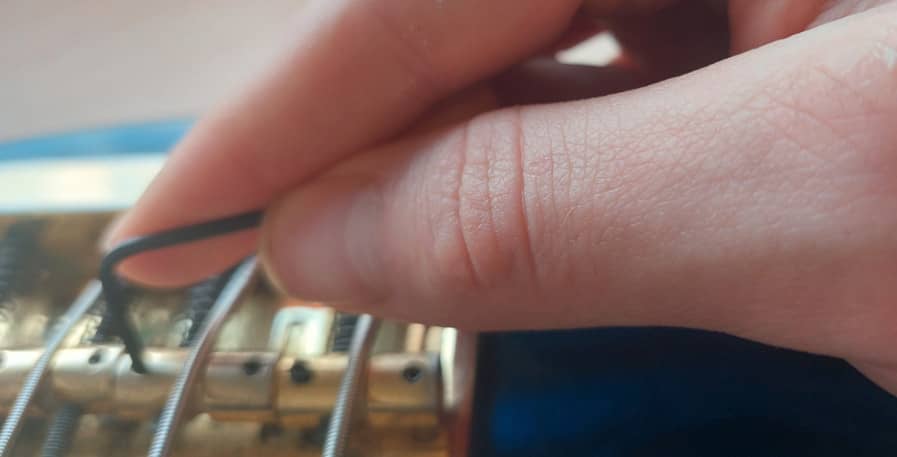
String Breakage
In my 15 years of playing bass, I`ve only had a string break exactly 2 times. One of those was when I was a complete beginner and played it way too hard while having tuned it up way too tense. The other was with a worn-out string that I should have switched out a long time ago.
Other bass players have not broken a single string, despite playing for decades. So as long as you tune your bass properly and your technique is not excessively aggressive, it is reasonable to expect strings to rarely break.
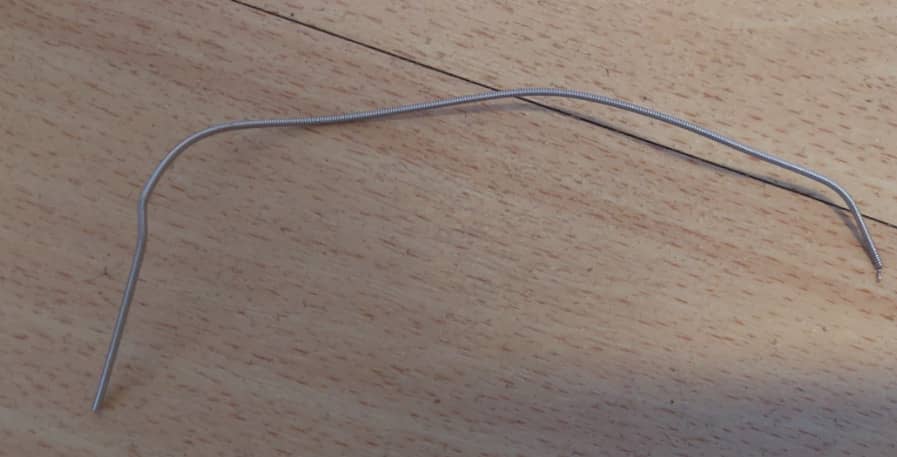
If a string breaks there is nothing you can do to salvage it and it needs to be replaced. One solution then is to buy a new set of strings and change every string. I find this preferable, as it retains an evenness across strings, especially when buying a different type of strings than I previously used.
Alternatively, you can buy a single string to replace the broken one. In that case, make sure to get one that is identical, or at the very least of a similar kind to the broken one to avoid discrepancies in the tone of your strings.
Replacing, restringing, and winding
The process of restringing or changing strings on a bass is fairly straightforward. While you might not need to restring your bass right now, I do recommend reading what goes into it.
- Loosen the current strings – Turn the tuning pegs on the headstock of the bass so that each string loosens completely from it.
- Remove the strings from the bass – Pull the strings through the bottom part of the bridge saddle. They should slide out naturally if you have loosed them completely in step 1.
- Store the old strings (optional) – Storing old strings is useful if they are your only backups. It`s also wise if they have a niche sound to them that you might want to make use of at one point. If you decide to keep them, they can be coiled into zip-lock bags and stored away.
- Attach the new strings through the bridge saddle – Similar to how you pulled the old strings through the saddle, insert the new ones through it. The strings will have a knot at the end of them that will naturally lock into the saddle once fully inserted
- Cut the new strings – Bass strings are thick. Thus, to cut them you ideally want to use a string cutter. Alternatively, bend the string where you would normally cut it, and twist it around til it breaks apart. This takes a bit more work and results in an uneven end to the string, but I`ve done this many times without issue. If you are inexperienced with cutting strings, I recommend cutting them 4 inches (or 10cm) above their tuning peg. This will give you enough string length to wrap it around the peg comfortably. If it is still too long, it is better to cut it again, rather than being left with too short of a string.
- Wind the new strings – In the center of the tuning pegs, there will be a small hole where you can insert the strings. Insert them there and then wrap the strings around the pegs. Wrap from the top down, with each wrap going underneath the next one. For most basses, 2-3 wraps will be sufficient, though there are cases where the number of times to wrap a string around a peg should be as high as 4-5.
- Tune the bass – Now with the strings attached and winded around the pegs, it`s time to tune your bass. I recommend using one hand to press the string you are tuning against the fretboard, and the other to tune it. This is to ensure that the string remains in the nut and does not break loose while tuning. If you are unfamiliar with tuning, School Of Rock has a great resource on how to tune your bass.
Rejuvenating bass strings
No matter how much you clean them, your bass strings will eventually start to lose their brightness and zinginess. The good news is that you can generally reuse bass strings by rejuvenating them.
I go more in-depth about this in the linked article above, but in short, there are two ways to do this.
The first way is to bathe the strings in denatured alcohol, also known as methylated spirits.
This consists in soaking the strings for a 24-hour period in the spirits. Keep in mind, denatured alcohol is poisonous and flammable so do make sure to read the product description and do your due diligence before using this method.
The other way, somewhat of a classic among bass players, is to boil your bass strings. This is less time-consuming than the spirits method, as you will usually only need to boil strings for 10-15 minutes. Thicker strings, such as the E, or a 5-string B, will take longer to boil clean than thinner strings.
Depending on the strings, I generally rejuvenate them 3-4 times before I feel the need to change them out completely. Milage may vary though, and I`ve had some strings that could barely be rejuvenated. Thus, keep in mind that while oftentimes effective, this is not a surefire method to fix dying strings.
Conclusion
Regular and sufficient cleaning and proper storage combined with string rejuvenations and changes will go a long way in maintaining the condition of your bass.
Setups, battery changes, and the fixing of electronic issues is also a part of it. However, these are aspects of bass maintenance you won`t have to do as often.
If you run into unexpected issues or are struggling with the more technical aspects, it can be a good idea to consult a luthier.
Not only will they help your bass get up to speed. They are also usually willing to talk about the issue at hand and teach you about it. Thus, you will be better equipped to handle the issue at hand on your own if it arises again in the future.
This article has been long and in-depth, but remember that by the end of the day, bass maintenance is fairly simple. Thus, if you stick to the tips outlined above, you will retain your bass in good condition, as well as be prepared for any unforeseen issues that could happen to it.